
You may ask, why should I exclude myself from Google Analytics?
The main reason here is to get “real data” as accurate as possible from your website. You may have visited your website every now and then to occasionally check on it, and Google Analytics may capture you as a traffic or user.
Apart from website traffic, you would probably do form submission testing on your website to make sure that your forms are working. And if you were to set form submission goal on your account, it means that your submission will be captured as a goal and the data will be included in your statistics, which may result in inaccurate data.
Therefore, it is crucial for you to exclude yourself in Google Analytics’ data and we will show you exactly how you can do that in this simple tutorial.
Step 1: Login to Your Google Analytics Account
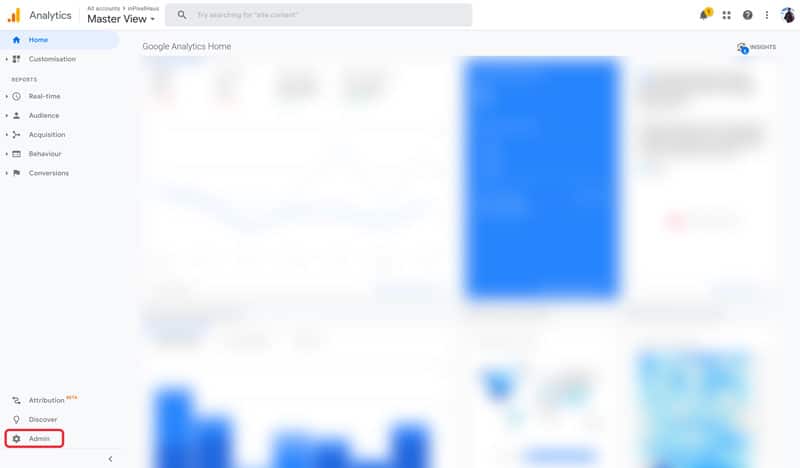
Log in to your Google Analytics account. If you don’t have an account yet, you can create one via Google Marketing Platfom. It is really easy to set-up, however, you would need to paste a short script/code onto the <head> tag of your website. If you need any assistance with this, you may contact us and we can help you.
Once you are logged-in, navigate to the bottom left panel and click on “Admin” (marked in red).
Step 2: Select Filters Under View Settings
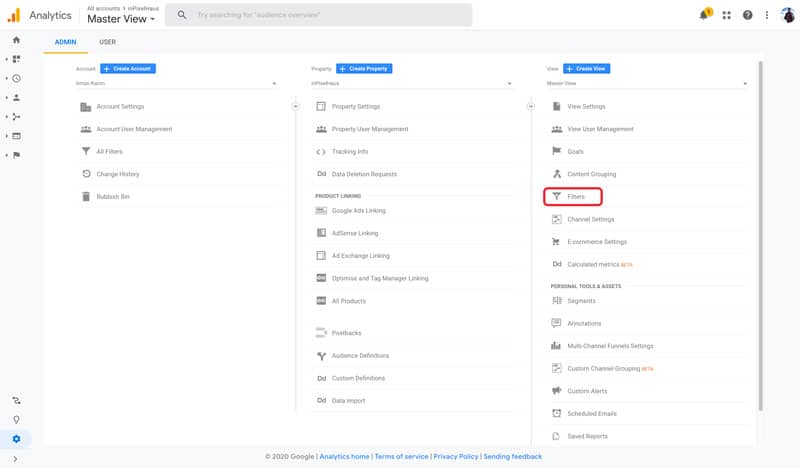
You’ll see alot of settings for you to choose. Google Analytics breaks it down into 3 different categories; Account, Property, and View. So for now, we’ll be looking at View > “Filters” (marked in red), which is located on the extreme right column.
Step 3: Add Filter
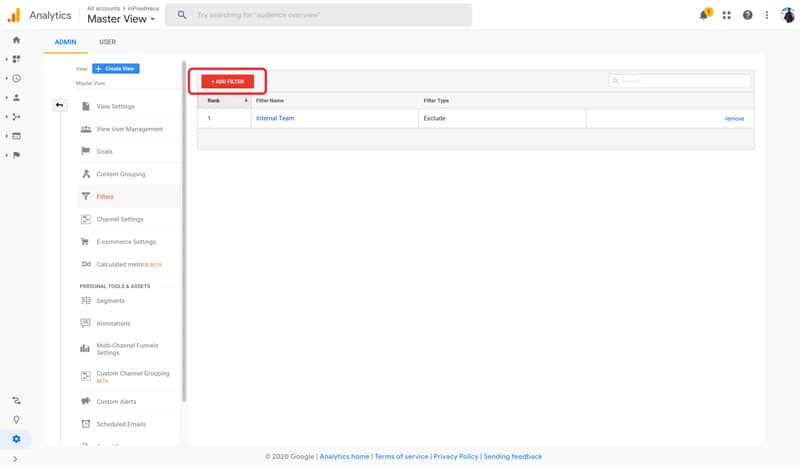
Click on “+ ADD FILTER” (marked in red).
Step 4: Define Your Filter Settings
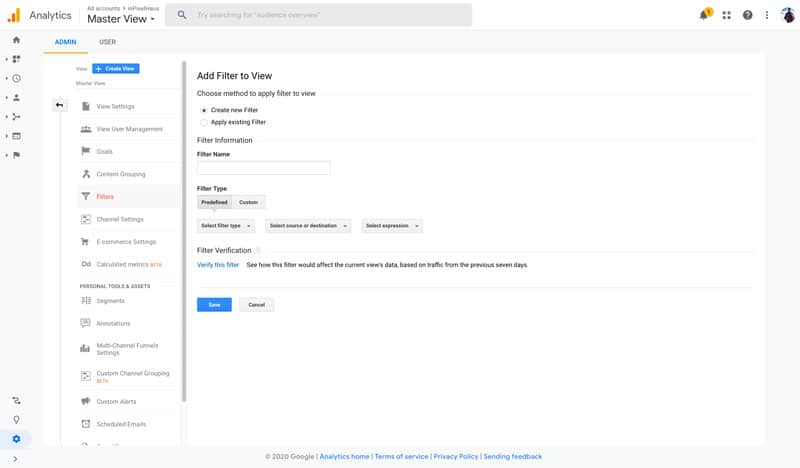
Select “Create new Filter” option and give your filter a name. It can be any name that you wish to define as long as it can be easily understood by your team and yourself that this filter is to exclude themselves from Google Analytics’ data.
Under the Filter Type, choose “Custom”.
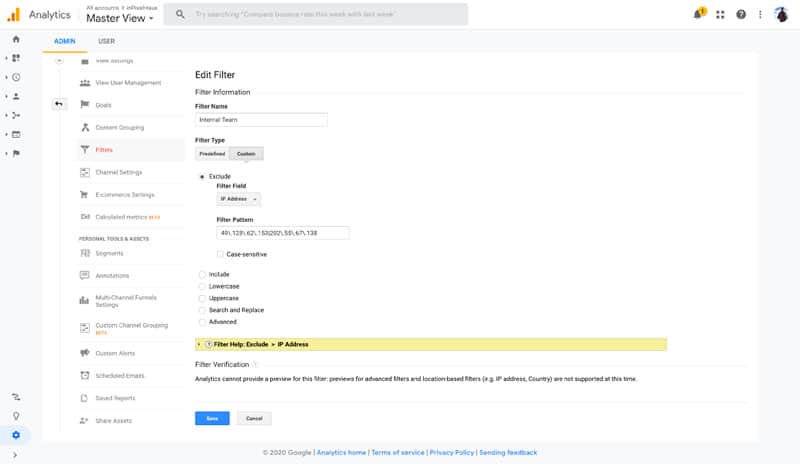
Upon selecting “Custom”, you will get more options. Select “Exclude” and under “Field Field”, choose “IP Address”.
The next setting is critical to define your team and your IP addresses under “Filter Pattern”. Find out my IP Address.
Exclude a Single IP Address
If you just have 1 IP Address to exclude, simply copy and paste your IP Address to the text field (e.g. 192.168.0.1). No special formatting is required for single IP Address.
Exclude Multiple IP Addresses
Things are little more complicated with multiple IP Address, which you’ll probably use if you have more than 1 office locations or you visit your website occasionally be it at home or the office.
For this method, you need to use an expression. For example, your IP Addresses are 192.168.0.1, 186.168.0.1, and 101.164.52. With this, you should separate your IP Addresses with “|” and “\” before every dots. From the example above, this is how you would put your multiple IP Addresses: 192\.168\.0\.1|186\.168\.0\.1|101\.164\.52\.188
Google Analytics allow you to enter a maximum of 255 characters for the IP Addresses. This will cause an issue if you have a long list of IP Addresses to filter. A quick fix for this is to create another custom filter and add the remaining IP Addressess on a separatre filter until all of your IP Addresses are filtered out.
Once you have defined your IP Addresses using the format above, you can “Save” the filter and that is it!
Google Analytics will now exclude anyone from the defined IP Addresses to be excluded from your Google Analytics’ data and you will get a more accurate data from your website.


