It was a struggle for us in the beginning when we try to work with WordPress. We had no clue on what to do and we found a few online articles which are mainly curated for intermediate to advanced users. So here is our guide on how you can install WordPress on your server, and don’t worry, this is a step by step tutorial suitable for beginners.
Gather Your Resources
Before you jump straight into it, gather the essential resources that you require in order to successfully install your WordPress website onto your web server. Below are the essential resources you need to get started:
- Web Hosting Server
- Database
- WordPress Core Files
- FTP Client (This is optional but it will make your job working with your server much easier)
1: Web Hosting Server
A web hosting server is a place where your web files are stored. So your WordPress files will be placed here. There are a lot of web hosting servers available in the market right now and the price can be competitive. Personally, we have tried a few hosting companies from both local and overseas, and have tried the various web hosting packages that they offered from shared hosting to cloud server. They may offer a cheap hosting as low as USD3.99 per month but it may not be reliable in terms of your server’s uptime and security.
We offer our very own hosting plan to our clients at a reasonable price with guaranteed security simply because cannot find any other reliable web hosting at an affordable price.
But if you are starting small and want to use the web server for testing purposes, there is no harm to go with those cheap web hosting providers.
Once you have purchased a web hosting server, your provider will provide you with a login to the backend of the server. This varies from provider to provider. Most of the time, they will provide you with cPanel. If your hosting provider does not offer cPanel, don’t worry! There are other ways to go around it. Just that cPanel is popular and widely used by many web hosting providers.
It is also good to know if your web hosting server comes with a database (required for all WordPress installation). Therefore, ask your preferred web server provider before you make any commitment to go with them.
2: Database
A database is a must-have in order to get your WordPress website to work. This is because WordPress is a Content Management System (CMS) and therefore, require a database to store all of your website’s content. The most common and easy to use database client is PHPMyAdmin. You don’t have to know fancy coding to create, edit, or delete any tables of fields in the database.
Once your database is created, take note of the following information:
- Host
- Name of Your Database
- Your Username
- Your Password
- Port (Usually not required)
3: WordPress Core Files
Now that you got your web server and database ready, it is time to download WordPress source files. There are 2 versions of WordPress; .com and .org. Be sure to go to https://wordpress.org/download/ and download the zip files from that website.
Once you have downloaded it, we can now proceed to the next stage, which is to upload your WordPress Files!
4: FTP Client
There are a few FTP Clients out there and the one that we are currently using is FileZilla. Initially, you’ll be lost and the user interface isn’t ‘beginner-friendly’. But as soon as you begin to use it, you’ll find it to be powerful and a great tool to have.
In order to connect to your web server via FileZilla, you need these 4 pieces of information:
- Host
- Username
- Password
- Port
This information can be different from your database, so don’t get confused and mix them up. You can get this information from your web server’s provider or cPanel.
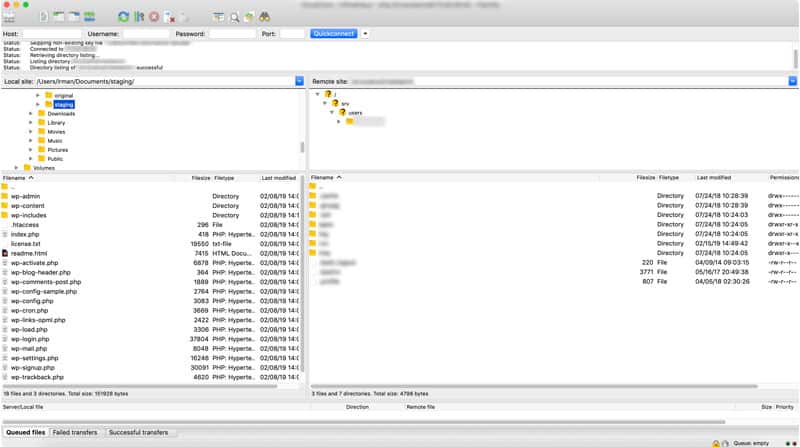
As you can see, there are 4 fields at the top of FileZilla, simply fill them up with the 4 details mentioned above and click ‘Quickconnect’.
The second part of the section is basically the processes and it will tell you if you have successfully connected to your server via FileZilla.
Below this processes section, there are 4 huge sections; the left part if basically your local or in layman’s term would be your computer folders and files. The right part is basically your server folders and files.
So once you have successfully connected to your server via the FTP, you can now drag your WordPress Files, which you have just downloaded (left section), over to your website folder in your server (right section). It may take a couple of minutes to transfer all the WordPress files.
Once that is done, you can go ahead and visit your website URL/domain and there you go! WordPress is live on your web server. All you go to do now is to complete the configuration process.
- Select Your Preferred Website’s Language
- Enter the Database Information (info from step 2). You can leave Table Prefix as it is.
- Enter Your Website Details
If everything is in order, you will be directed to log in using your newly created WordPress account for the website and you can now design and develop your website from the backend of WordPress.